You are in for a treat this morning…Delores brought some 9” scraps to Quilting last Monday and gave us a little tutorial…and lucky you..YOU get to follow along too!!
Delores is going to show us how to turn some leftover scraps into something useful and pretty…something that would make an awesome and pretty gift! So pour yourself another coffee and pull up a chair…
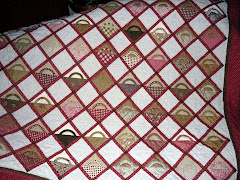
We are going to be making this…it’s a HOT PAD for the table! Isn’t it pretty…You can make it as big as you want but for this lesson they are going to turn out this size…approximately 9”.

This is what you start with: TWO pieces of fabric (9” each) and a piece of thermal batting (also 9”)…You place your three pieces in this order…the bottom fabric is face down, then the thermal batting (shiny side down), then the top piece right side on top facing you.

This is what thermal batting looks like…see the silver shiny side…

Next take 4 pieces of fabric…all 9”…( you want them to coordinate with the other two pieces). Fold these four pieces in half diagonally as in picture…

Now take your sandwiched thermal batting sandwich…

and place one of the triangles in the left top corner…matching raw edges…

Then place the alternating colour in the right top corner…raw edges matching…

Place the third triangle in the bottom right corner…raw edges matching…are you following so far?

Now comes the tricky part…lay the last corner down in the bottom left corner but you need to lift the first corner up to tuck it in. See picture. (this reminded me a little of folding the cardboard lid to a box…get it?)

This is what it looks like after you tuck it in…then give it a loving pat when done…whew!

Now Delores pulled a ‘Martha’ on us…she brought out another demonstration model…not to confuse you BUT pretend this is the same black, white and red model…
OK..now sew all around your triangles 3/8” in just like Delores did…trim and clipping corners carefully!
 Now turn this whole unit reaching in at the center between the folded edges of the hot pad.

And presto! Look at those lovely finished edges!!
 Pretty isn’t she?! BUT wait…Delores isn’t finished yet!!

Look at what she is doing…gently folding back the edges of the triangles. They are on the bias so they easily bend back to form a little window in the middle. Pin…

Continue turning and pinning…

Keep pinning until all four triangles are pinned and you have your window…

And stitch…you will need to use your walking foot on this project. Yup we can SEE the window!!

Yes, she is pretty darn cute….
 And sew is this one!!
Don’t you want to rush out and make a whole slew of them!! I’ve got to get some of that thermal batting…because I have lots of 9” squares! Wouldn’t this be a lovely way to use up any leftover 10” Layer Cake Squares…OR picture this…you have just finished making a gorgeous tablecloth…with your leftovers make a bunch of these!! How elegant and classy…and your KNOW we are all that!! :o)
THANKS SO MUCH DELORES! You turned this into a fun and EASY project!!
Have a wicked Wednesday and Happy Quilting!~P


What a great tutorial. Thank you.
ReplyDeleteLove it...I definitely will try it out. Thanks for the tutorial. Oh, also liked your great GS buys.
ReplyDeleteReally like how she turned back the triangles to make the window. Yep, gonna make one or two..... of those! Thanks to you both.
ReplyDeleteWhat a great tutorial. They are really nice hot pads. I will making some of those forsure.
ReplyDeleteThanks for sharing.
Wonderful design and tutorial. I have a couple of stitcheries that I need to make into hot pads, I bought lots of the thermal batting.
ReplyDeleteDebbie
that was a nice tutorial, and worth a try!
ReplyDeleteWow that's great!! Thanks for sharing!!
ReplyDeletegreat tutorial, Paulette!!
ReplyDeleteHow pretty - great tutorial, thank you Paulette and Delores!
ReplyDeleteBrilliant. Thankyou and thanks to Delores too.
ReplyDeleteThanks so much. What a great idea and I have some of that thermal batting left from some place mats I made. Another project to have a go at - may be Christmas presents? Susie x
ReplyDeleteThis is sooo neat Paulette! Will definitely be making some of these!:) Great tutorial and easy to follow along- thanks for sharing!!
ReplyDeleteThanks for the tutorial! I definitely see some of these in my future.
ReplyDeleteGosh Darn! Those are the cutest table hot pads I have seen. Simple enough for me to try and they are classy plus elegant - just like you said! Thanks for sharing such a great idea! Tootles
ReplyDeleteI make a version of these and give them with a loaf of homemade bread as gifts all the time. However, mine only have 5 pieces of fabric without the folded edges showing the 6th piece of fabric. Now I've got to try this version. So cute!
ReplyDeletegreat tute. these are super cute
ReplyDeleteThese are great! Thanks for the tutorial :-)
ReplyDeleteAwesome tutorial. Thank you!
ReplyDelete